I’ve had a pvc garden twirler or whirligig or wind spinner for many years. It was purchased on a camping trip from another camper who made various spinners to hang on the awnings of your trailer. I love the motion of the spinners and had to have one of my own. I decided that I wanted another of these for the garden and set about to make my own.
I made this through trial and error while comparing it to the old one I had. You have to keep adjusting the angles till you get it right. I’m not a professional at writing down instructions and just do the best I can. If yours doesn’t turn out right the first time, you need to presevere.
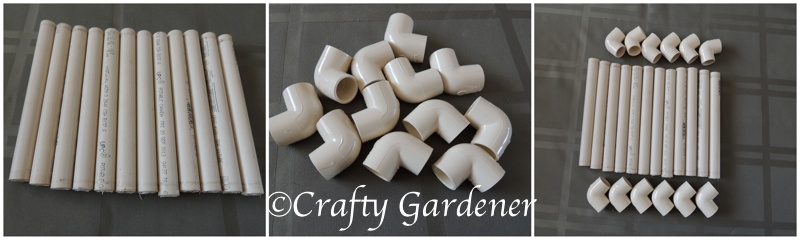
You need pvc piping and corners or elbows that can be purchased in home improvement stores. The pipe (1/2 inch diameter) comes in a long piece and needs to be cut into 15 cm or 6 inch pieces. You need 12 pieces and 12 elbows. The cost of making the twirler was about $10.00. If you have bits and pieces left over from plumbing jobs it will cost a lot less.
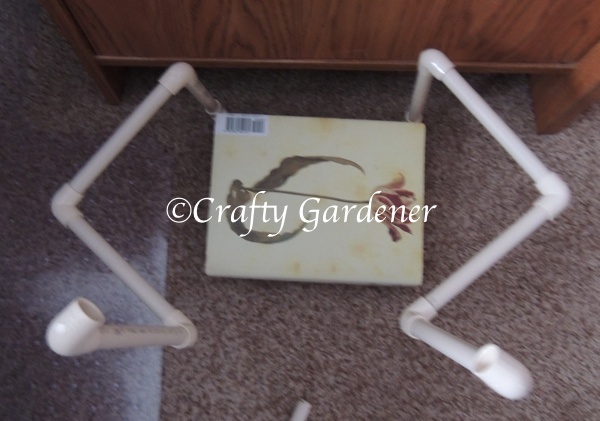
Putting the pieces together into the right shape is tricky and I was lucky to have one to copy. I started by putting it on the floor with a book to keep it upright and from there I went 2 pieces at a time. It was hard writing down the directions but I gave it a try and along with the photos I’m hoping it will help you put together a pvc twirler of your own.
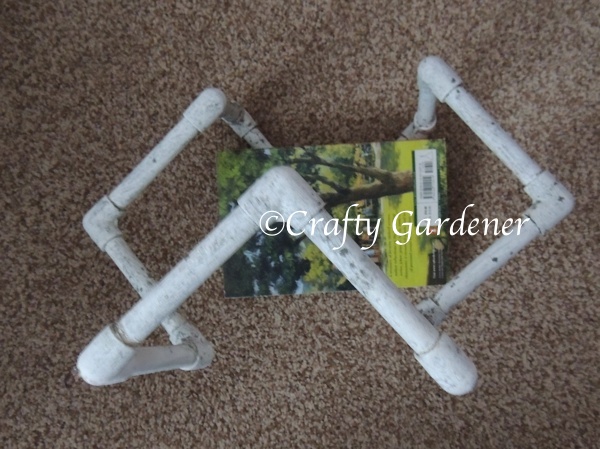
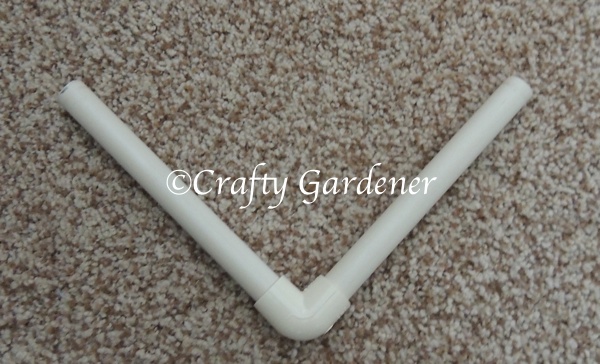
1. You start by connecting two pieces with an elbow. This makes a 90 degree corner or a V shape. Be sure to push the pipe tightly into the elbow. You will need another one of these to finish off the twirler at the end.
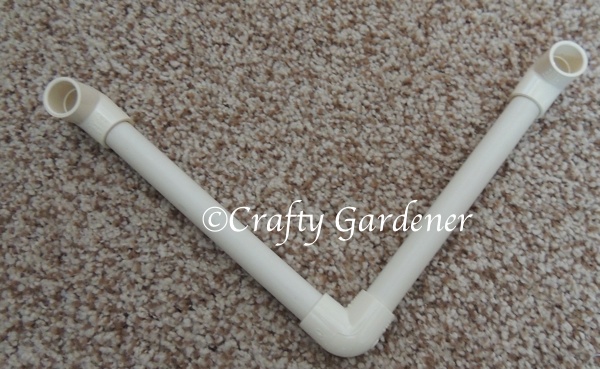
2. Elbows go on the other ends of the straight up pieces with the open part pointing up from the straight piece.
3. Add straight piece with elbow on the ends facing away. Do the same on the other side.
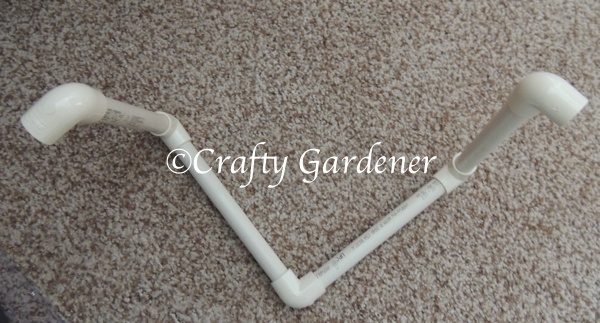
4. Add straight piece with elbow so it would be at a 90 degree angle with bottom straight pieces. Do the same for each side. The hole on the elbow points in the same direction as the first v shaped piece.

5. Take 2 straight pieces and add an elbow at one end and push them into the open elbows at each side, holes pointing up. These pieces run parallel with the bottom v pieces. Always be sure to push the connections tight.
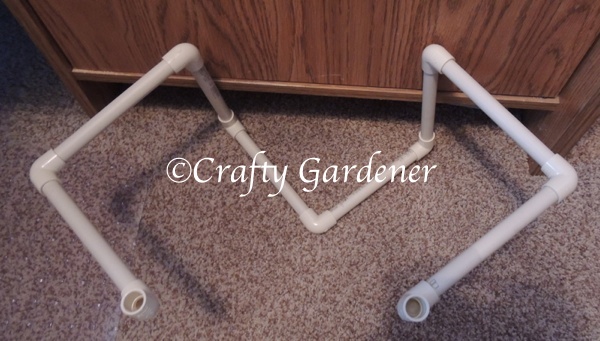
6. Add a straight piece with an elbow, hole pointing inward, to each side. By this time I needed to add a heavy book onto the bottom to keep the twirler from tipping.
7. For the last bit you make a piece like the very first one with 2 straight pieces and one elbow and it fits into the open elbows.
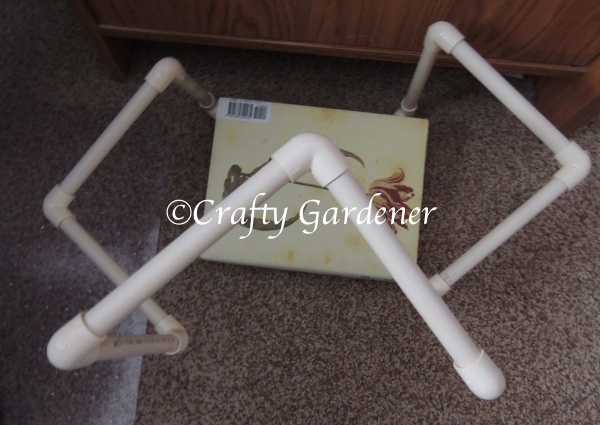
I held the twirler up and looked to see if any pieces needed to be adjusted.
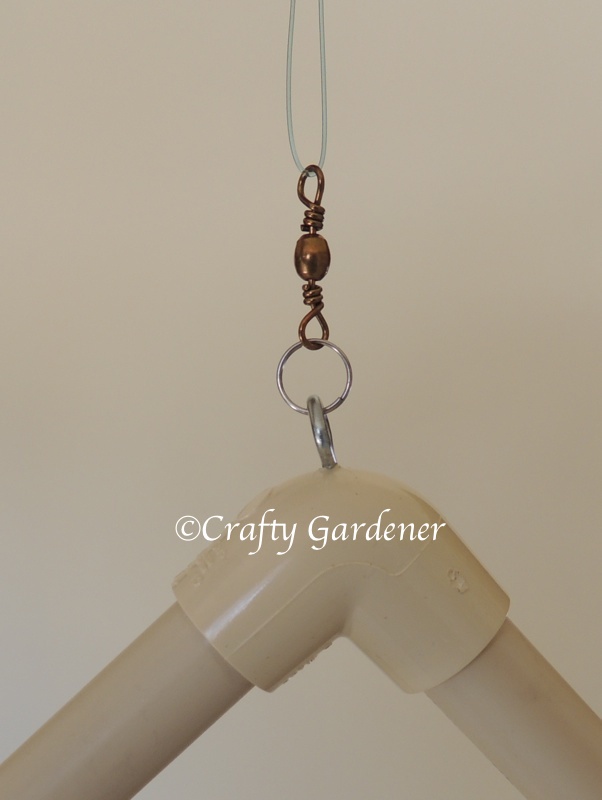
Now you need to screw in an eye hook onto one corner elbow, attach a fishing swivel and some fishing line and hang your twirler in the garden. Be sure it has enough space to move around.
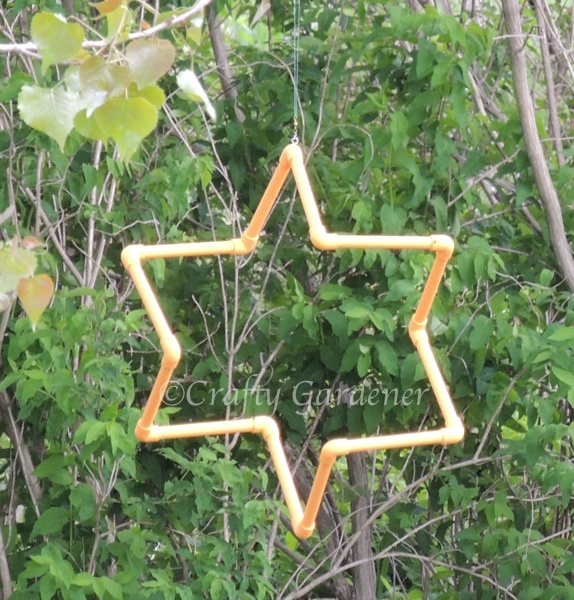
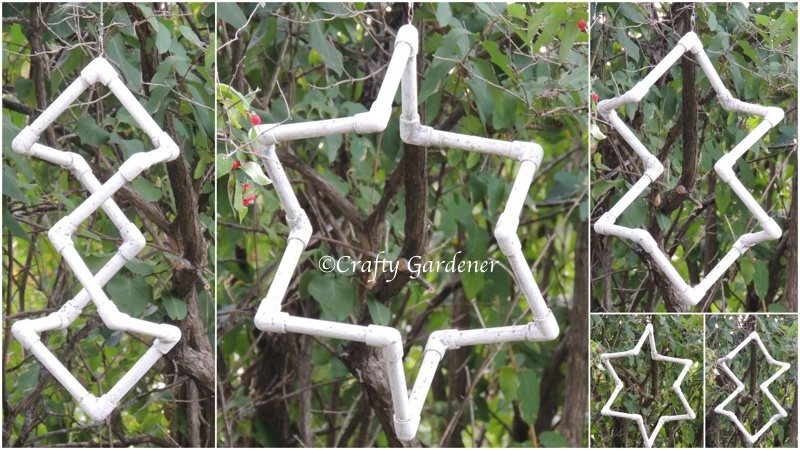
Here is the old one hanging in the honeysuckle bush towards the back of the garden. From the deck you can see the shapes … star, triangles, rectangle and squares as it gently twirls in the breeze.
My old one has been a couple of different colours and as soon as the weather is nice enough to get outside I’ll be painting both the old one and new one … haven’t decided what colours to use yet.
I have no idea who originally designed this type of twirler. I’ve seen a couple of different directions written up but they didn’t have photos. I’m a visual learner and I’m hoping these instructions will help you if you decide to make one.

Make a twirler/wind spinner
- conch shell twirler
- crochet wind spinners, large
- crochet wind spinners, small
- driftwood spinners
- pinwheel twirler
- plastic canvas twirler
- pvc twirler
- spiral twirlers


Joe Wilson
i made one of these wind spinners and have done the way you show in video, but it wont spin like it should
Jennifer Fouts
Thank you so much for posting this! I love this design, I remember my ex boyfriend had one of these twirlers in this exact star shape, made from wood. It’s pretty rare and special to me. You’re right that this is a tricky design but your photos laying it out step by step helped big time.
Michelle Moshay
Thank you for this, I did make one years ago, but could not remember how I did it. It is tricky, so I really appreciate finding this, it is the best visual help ever.
Crafty Gardener
Thanks for the visit and comment. Good luck with the making of your pvc twirler.
April
I’ve been trying to find the old wood pattern similar to this. I loved watching them on the porch as a child. Has anyone found how to make the old wooden ones?
Mary
Love your ideas!
Patsy
I had a sister who made one of these. She said that her husband and her looked at a reflection of the twirler in a glass door and that helped.
Crafty Gardener
Received this via email:
I was writing to thank you for the directions for the PVC pipe star. My father-in-law made us one years ago, and it fell apart. He has since passed away so I was trying, in vain and much frustration, to put it back together that last few days. Even searching Google was not any help–until today when I found your site link. You are very much appreciated because it was making me crazier than I already am.